
What’s the best way to boost the productivity of your pepper plants? See our guide to growing and harvesting strong, healthy plants that will produce peppers to be proud of!
About Bell Peppers
Sweet bell peppers are a tender, warm-season crop with a long growing season (60 to 90 days).
Many gardeners need to start peppers indoors to give them a head start! However, if you don’t have the means to sow peppers or have simply run out of time, remember you can find a fantastic range of ready-to-go seedlings and young plants online, while some garden centers and nurseries stock plants on the cusp of fruiting.
Peppers resist most garden pests and offer something for everyone: spicy, sweet, or hot; and a variety of colors, shapes, and sizes. On this page, we focus on growing sweet bell peppers but much of the advice for growing peppers is the same.
We also have a growing guide for jalapeño peppers for those who like it spicy! (Bell peppers do not contain capsaicin, which is the compound that gives hot peppers such as heir pungency and heat.)
Common Bell Pepper Questions
Do different-colored peppers come from different plants?
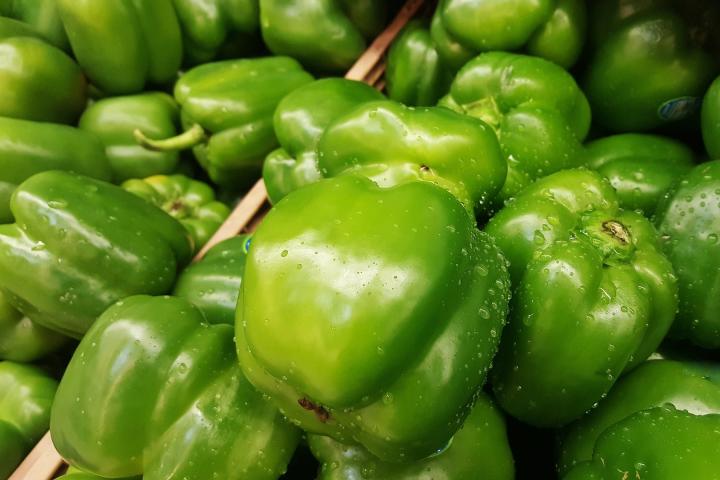
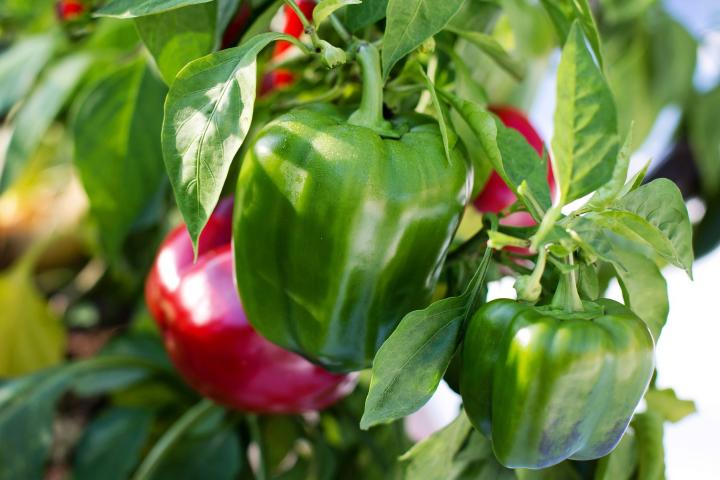
Surprisingly enough, the green and red bell peppers that we commonly see in supermarkets are actually the same pepper; the red bell peppers have just been allowed to mature on the plant longer, which changes their color and lets them develop a higher Vitamin C content. More mature peppers also tend to be sweeter than their greener counterparts.
However, there are quite a few varieties of bell peppers out there, including purple, yellow, orange, white, and brown ones.
Are there male and female peppers?
There is a popular myth which states that pepper fruits can be either male or female—the difference between them being that male peppers have 3 bumps on the bottom and are better for cooking, while female peppers have 4 bumps, have more seeds, are sweeter, and are better for eating raw. This is not true! Pepper fruits do not have a gender and any obvious difference between fruits is simply the result of growing conditions or variety.
When to Plant Peppers
- If you’re sowing peppers indoors, start them off early in spring to give them more time to crop throughout the summer! Start seeds indoors 8 to 10 weeks before your last spring frost date. Germination is quickest at 77° to 90° Fahrenheit. If you’re planning to plant peppers outside, this should be done 2 to 3 weeks after the threat of frost has passed in the spring.
- To achieve these sorts of temperatures, you’ll need a heated propagator or heat mat. You can start seeds at lower room temperatures, but expect germination to be slower and potentially erratic. Ideal conditions should see seedlings appear within about two weeks, but some varieties take as long as five, so don’t give up on them too soon!
- If growing from nursery-bought transplants, plant them outdoors 2 to 3 weeks after the threat of frost has passed. Be sure to harden young plants off prior to planting outdoors, as peppers are very sensitive to cool temperatures.
Start Peppers Indooors
- Choose a potting mix that easily drains through after each watering. A quality, free-draining potting mix can be opened up a bit more by just mixing in some perlite like this. If your peppers are destined to go outside for the summer consider using a soil-based potting mix, which will add extra weight so that containers don’t topple over in the wind.
- The soil temperature should be at least 70°F (21°C) for optimal seed germination, so keep them in a warm area for the best and fastest results. Use a heat pad under the seed tray, if necessary.
- Plant seeds about 1/4-inch deep (or refer to the seed packet).
- Separate seedlings out and move them into their own pots before they become drawn and leggy. If seedlings do get a bit too tall, replant them up to their lowest leaves, just like tomatoes, to help support them. Keep seedlings warm until you’re ready to plant.
- Peppers need plenty of light to encourage healthy, stocky plants that will be less prone to growing top-heavy and flopping over, so grow them on somewhere that is both warm and bright – a greenhouse or conservatory, or the sunniest windowsill you can muster until it’s time to move them outside.
- Pot young plants on as the roots fill their pots. Transplanted seedlings begin at a pot size of around 3 inches, but it won’t take long for them to outgrow this. Once plants have around five to eight leaves and you can see roots at the drainage holes, it’s time to move them up a pot size – something like a 5-inch pot. Then once they’ve filled this, pot them on again, this time into a pot of about 8 inches. The final container size for most pepper plants is around 9 to 12 inches. Potting on in stages like this ensures plants aren’t ‘lost’ in containers significantly larger than their root balls. It also means less wasted potting mix should plants fail at a stage of growth.
- You can keep the peppers in pots or transplant them outside into the garden.
Preparing the Outdoor Planting Site
- Pepper plants require full sun to produce the largest and healthiest fruit, so pick a site that won’t get shaded out by trees or other garden plants.
- Soil should be well-draining and rich in organic matter. Peppers don’t like to have “wet feet,” so avoid planting them in locations that get too wet.
- A soil consistency somewhere between sandy and loamy will ensure that the soil drains well and warms quickly.
- Soil pH should be on the slightly acidic side—6.0 to 7.0, ideally.
- A week before transplanting peppers into the garden, introduce fertilizer or aged compost into your garden soil. Alternatively, mix in a slow-release fertilizer.
- Avoid planting peppers in places where you’ve recently grown other members of the nightshade family—such as tomatoes, potatoes, or eggplants—as this can expose peppers to disease.
Planting Peppers Outdoors
- Begin to harden off plants about 10 days before transplanting outdoors, which should be done
- The soil temperature should be at least 60°F (16°C) at the time of planting (though warmer is better), as peppers are very sensitive to cool temperatures. Speed up the warming of the soil by covering it with black plastic or a dark mulch about a week before you intend to plant.
- When you transplant seedlings outdoors, space them 18 to 24 inches apart.
- Plant the transplants no deeper than they were already planted in their pots; otherwise, the stems may become more susceptible to rot.
Check out this video to learn how to plant bell peppers:
Watering Peppers
- Peppers should never be allowed to struggle and soil moisture is especially important in this regard. Peppers like a good dousing but should be left to almost dry out between waterings – they need that period of relative dry. Once a week is typical. If the leaves have gone a bit limp, you’ve probably left it a little too long, but a thorough watering should sort things out.
- If you’re growing in pots you can gauge whether the potting mix is dry enough by lifting the container to check its weight – it should be noticeably lighter, by pushing a finger into the soil to feel for moisture about an inch down.
- If you live in a warm or desert climate, or are simply experiencing a hot, dry summer, watering everyday may be necessary. Peppers are susceptible to blossom-end rot if watering is not adequate.
Fertilizing Peppers
- Peppers will need regular feeding using a liquid feed that’s high in potassium to promote flower production and fruit set – a tomato fertilizer works well. A liquid seaweed with a good range of trace minerals works well, too. A lack of these minerals, together with over watering, is a common cause of yellowing leaves.
- After the first fruit set, fertilize with a low-nitrogen fertilizer. (Too much nitrogen can cause the plant to produce foliage instead of flowers and fruit!)
More Plant Care Tips
- Weed carefully around plants to avoid disturbing roots.
- If necessary, support plants with cages or stakes to prevent bending. Try commercially available cone-shaped wire tomato cages. They may not be ideal for tomatoes, but they are just the thing for peppers. Or, build your own garden supports.
- In cooler, temperate climates or it gets windy where you live, consider growing your peppers under some form of protection. Peppers love this extra warmth. However, if it gets very hot, this can cause flowers to abort and drop, so move plants back outside when temperatures soar.
Here’s another great video on growing boosting the productivity of your peppers!
Pollination can be reduced in temperatures below 60°F (16°C) and above 90°F (32°C). Too much nitrogen in the soil can produce healthy foliage growth but discourage fruit from setting. Flower drop is caused by high heat OR very low humidity. If the air is very dry, douse the soil with water and thoroughly mist plants.
Spider mites and aphids are two common pests of peppers, especially plants grown under cover. Spider mites – identified by the fine webbing on the underside of leaves – thrive in hot, dry weather. Mist-spray these areas regularly at the first sign of an attack to make conditions as hostile as possible for the mites.
Aphids also prefer the undersides of leaves but are found on other parts of the plant too. Squish isolated clusters, or for more serious infestations, take plants out into the open, away from other peppers, then carefully turn the plants upside down so you can brush Spider mites and aphids are two common pests of peppers, especially plants grown under cover. Spider mites – identified by the fine webbing on the underside of leaves – thrive in hot, dry weather. Mist-spray these areas regularly at the first sign of an attack to make conditions as hostile as possible for the mites
Aphids also prefer the undersides of leaves but are found on other parts of the plant too. Squish isolated clusters, or for more serious infestations, take plants out into the open, away from other peppers, then carefully turn the plants upside down so you can brush or blast the aphids off with a hose.
See more pest and disease information in the below chart:
| Pest/Disease | Type | Symptoms | Control/Prevention |
|---|---|---|---|
| Anthracnose | Fungus | Yellow/brown/purple/black spots on leaves; sunken, dark spots on stems and fruit; spots may develop a salmon-pink, gelatinous mass; eventually, plants rot | Destroy infected plants; choose resistent varieties; provide good drainage; avoid overhead watering; apply compost for nutrition; use mulch; practice crop rotation. Find images and more information about anthracnose here. |
| Aphids | Insect | Misshapen/yellow leaves; distorted flowers/fruit; sticky “honeydew” (excrement produced by aphids); sooty, black mold that forms on honeydew; large presence of ants on plants | Grow companion plants to either attract aphids away (nasturtiums) or repel them outright (basil, rosemary, strong-scented plants); knock aphids off plants with water spray, apply insecticidal soap; put banana or orange peel around plants; wipe leaves with a 1-2% solution of liquid dish soap and water every 2-3 days for 2 weeks; add native plants to attract aphid predators. Find images and more information about aphids here. |
| Blossom-end Rot | Nutrient Deficiency | Caused by lack of sufficient calcium uptake. Symptoms: dark, water-soaked spots on blossom end of fruit (the side opposite the stem) may enlarge and become sunken, leathery, rotted |
Remove affected fruit; plant at proper soil temperature; water deeply and evenly; use mulch; maintain proper soil pH (6.5) and nutrient levels; avoid excessive nitrogen; provide good drainage; avoid damaging roots. Find more images and information about blossom-end rot here. |
| Colorado Potato Beetles | Insect | Yellow-orange eggs laid in clusters on leaf undersides; larvae and adults chew holes in foliage | Remove eggs/larvae/beetles by hand; use straw mulch; weed around plants; use row covers; destroy plant matter at end of season; practice crop rotation |
| Flea Beetles | Insect | Numerous tiny holes in leaves (as if they had been hit by a tiny shotgun) | Use row covers to physically block flea beetles; mulch heavily; add native plants to attract beneficial insect predators. Find more information and images of flea beetles here. |
| Mosaic Virus (Cucumber) | Virus | Symptoms vary, but may include: stunting; mottled green/yellow/white pattern or ringed spots on leaves/fruit; distorted leaf growth; warts on fruit | Often spread by aphids. Destroy infected plants; choose resistant varieties and certified virus-free seed; use row covers; disinfect gardening tools after each use; keep garden weed-free; use mulch. Find images and more information about mosaic viruses here. |
| Root-knot Nematodes | Insect | Roots become “knotted” or galled; plants stunted/yellow/wilted | Destroy affected plant matter (especially roots); choose resistant varieties; expose soil to sun (solarize); add aged manure/compost; disinfect gardening tools between uses; till soil in autumn; practice crop rotation |
| Tomato Hornworms | Insect | Chewed leaves (initially toward top of plant); rapid defoliation; black/green excrement; gouged fruit | Check undersides of leaves for hornworms, remove by hand and dispose of hornworms. (If you encounter hornworms that have white, ricelike cocoons on their backs, relocate them instead; the cocoons belong to beneficial parasitic wasps.) Till soil in autumn and spring; companion plant with dill/basil/marigolds to attract (and trap) or repel hornworms; spray plants with Bt (Bacillus thuringiensis). Find images and more information about hornworms here. |
Look for varieties that ripen to their full color quickly; fully mature peppers are the most nutritious—and tastier, too!
- Green peppers that turn Red: ‘Lady Bell’, ‘Gypsy’, ‘Bell Boy’, ‘Lipstick’
- …Orange: ‘Milena’, ‘Orange Sun’
- …Yellow: ‘Golden California Wonder’
How to Harvest Peppers
- Once the plants begin producing fruits, pick them promptly, the moment they have reached their full size and color. Regular picking encourages plants to produce more flowers and, of course, more fruits.
- That said, the longer bell peppers stay on the plant, the more sweet they become and the greater their vitamin C content.
- Use a sharp knife or scissors to cut peppers clean off the plant.
How to Store Peppers
- Peppers can be refrigerated in plastic bags for up to 10 days after harvesting.
- Gluts of bell peppers can be dried whole in a dehydrator or any warm place with good airflow. If you just have a conventional, here are directions on how to dry peppers for storage:
- Wash, core, and seed the peppers. Cut into one-half-inch strips. Steam for about ten minutes, then spread on a baking sheet. Dry in the oven at 140°F (or the lowest possible temperature) until brittle, stirring occasionally and switching tray positions.
- When the peppers are cool, put them in bags or storage containers or airtight jars. Or, chop peppers up for packing into ice-cube trays. Freeze them then pop them out into freezer bags ready for dropping into recipes as needed.
- To learn how to make pickled bell peppers, watch this video!
- Get more tips on cooking with peppers.


