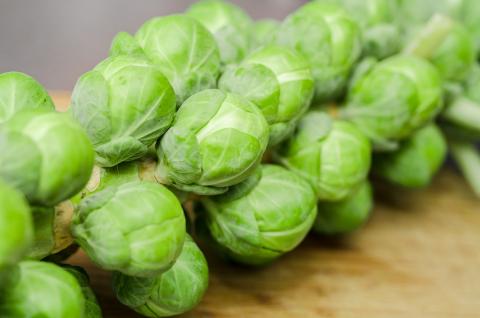
Brussels sprouts are a member of the cabbage family and an excellent source of nutrients. Here’s how to plant, grow, and harvest Brussels sprouts in your garden!
About Brussels Sprouts
Named for Brussels, Belgium, where they were first cultivated in the 16th century, Brussels sprouts are a vegetable that is commonly seen in the grocery store, but not-as-commonly seen in the home garden. This is probably because they aren’t the easiest vegetable to grow! They require a fairly long growing season (80–100 days to harvest) and are a cool-season crop, meaning that they produce best when grown for a fall or early winter harvest. The sprouts improve in flavor after a light frost or two.
As long as you plant them at the right time, keep them cool and well watered during the heat of summer, and protect them from pests, Brussels sprouts are a rewarding vegetable crop to grow—an accomplishment!
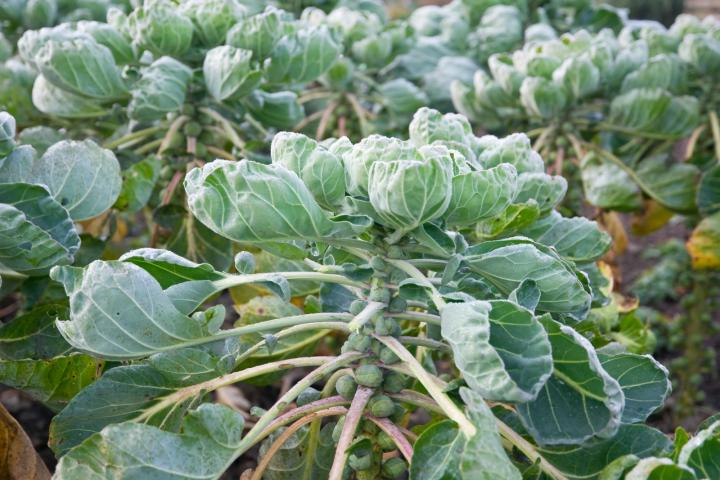
Brussels sprouts are a cultivar (cultivated variety) of wild cabbage, Brassica oleracea, which is the same plant species that cabbage, broccoli, cauliflower, kale, kohlrabi, and a number of other popular food crops stem from. Over generations and generations, this versatile plant has been bred in different ways to highlight its different features—flowers, leaves, buds, stem, and root—to provide us with a wide variety of foods! Brussels sprouts form as buds along the main stem of the plant, just above each leaf axil.
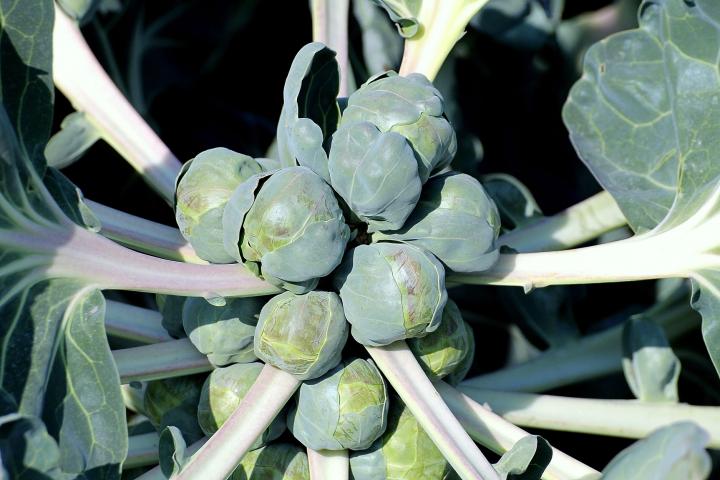
Note: Due to Brussels sprouts’ need for a long growing season, we recommend planting them with a fall or winter harvest in mind. They do best when allowed to mature during the cool days of fall.
When to Plant Brussels Sprouts
To determine the optimum planting time, count backwards from your first fall frost date using the “days to maturity” listed on the seed packet. Generally, this means sowing Brussels sprout seeds about 4 months before your first fall frost date.
- In regions with cold winters, where winter temperatures are often below freezing, start seeds in early to mid-summer. Plants will mature for a mid-fall or early winter harvest.
- In regions with mild or warm winters, where winter temperatures are occasionally or rarely below freezing, start seeds in mid- to late summer. Plants will mature for a mid- to late winter harvest.
Brussels sprouts may be started from seed indoors or sown directly into the garden. We recommend starting seeds indoors, as this gives seedlings a headstart and helps to protect them from summer heat and pests. Direct-sown seeds can take a few weeks longer to mature, so add 20 days to your planting date calculation if you plan to sow outdoors. (In other words, sow seeds outdoors about 20 days earlier than if you were starting them indoors.)
Choosing and Preparing a Planting Site
- Raised beds are especially recommended for cool-season vegetables, especially in the spring and fall, when temperatures are not consistent.
- Work several inches of aged manure and/or compost into the soil a few days before sowing or transplanting.
- Brussels sprout plants usually reach heights of 2 to 3 feet, so plan accordingly; they may require staking.
How to Plant Brussels Sprouts
- Sow seeds about ½ inch deep.
- If direct sowing seeds outdoors, sow seeds about 2 to 3 inches apart. (Seedling should be thinned to 12 to 24 inches apart when they reach about 6 inches tall.)
- Plant transplanted seedlings 12 to 24 inches apart.
- Water well at time of transplanting.
How to Grow Brussels Sprouts
- Thin young plants to 12 to 24 inches apart when they reach 6 inches tall.
- Fertilize with a nitrogen-rich product after thinning. Repeat every 3 to 4 weeks.
- Mulch to retain moisture and keep the soil temperature cool through summer.
- If growing during hot weather, be sure to keep the plants well watered. Inconsistent moisture can lead to subpar sprout development. Brussels sprouts should receive about 1 to 1½ inches of water per square foot per week.
- Consider using row covers to protect young plants from pests. Brussels sprouts are usually planted outdoors right when pests are at their worst!
- Do not disturb the soil around the plants; roots are shallow and susceptible to damage.
- Remove yellowing leaves at the bottom of the plant to allow for more sunlight on the stalk and to focus plant energy on healthy growth.
- To encourage plants to mature faster, cut off the top leaves 3 to 4 weeks before harvest.
- Note: If you intend to harvest sprouts into winter, leave the top leaves of the plant intact; they provide protection from snow.
- Cover plants with 10 to 12 inches of mulch if you plan to harvest into the winter.
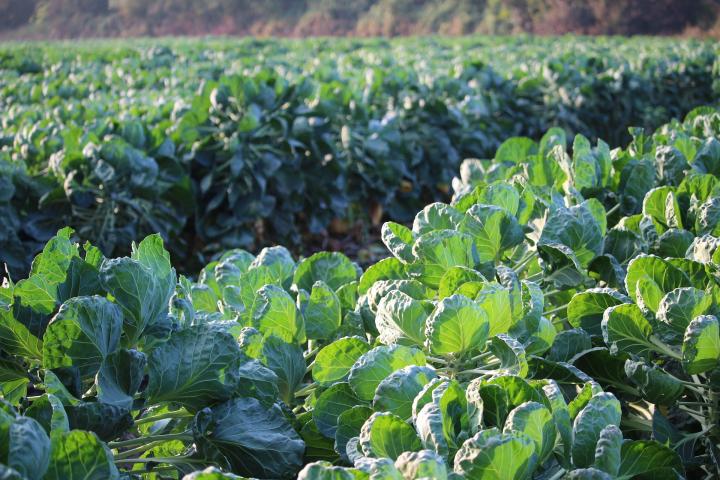
Brussels Sprouts Pests and Diseases
| Pest/Disease | Type | Symptoms | Control/Prevention |
|---|---|---|---|
| Aphids | Insect | Misshapen/yellow leaves; distorted flowers/fruit; sticky “honeydew” (excrement); sooty, black mold | Grow companion plants; knock off with water spray; apply insecticidal soap; put banana or orange peels around plants; wipe leaves with a 1 to 2 percent solution of dish soap (no additives) and water every 2 to 3 days for 2 weeks; add native plants to invite beneficial insects |
| Black rot | Fungus | Yellow, V-shape areas on leaf edges that brown and progress toward leaf center; leaves eventually collapse; stem cross sections reveal blackened veins | Destroy infected plants; choose resistant varieties; provide good drainage; remove plant debris; rotate crops |
| Cabbage loopers | Insect | Large, ragged holes in leaves from larval feeding; defoliation; stunted or bored heads; excrement | Handpick; add native plants to invite beneficial insects; spray larvae with insecticidal soap or Bt; use row covers; remove plant debris |
| Cabbage root maggots | Insect | Wilted/stunted plants; off-color leaves; larvae feeding on roots | Use collars around seedling stems; monitor adults with yellow sticky traps; use row covers; destroy crop residue; till soil in fall; rotate crops |
| Cabbageworms | Insect | Leaves have large, ragged holes or are skeletonized; heads bored; dark green excrement; yellowish eggs laid singly on leaf undersides | Handpick; use row covers; add native plants to invite beneficial insects; grow companion plants (especially thyme); spray Bacillus thuringiensis (Bt) |
| Clubroot | Fungus | Wilted/stunted plants; yellow leaves; roots appear swollen/distorted | Destroy infected plants; solarize soil; maintain soil pH of around 7.2; disinfect tools; rotate crops |
| Downy mildew | Fungus | Yellow, angular spots on upper leaf surfaces that turn brown; white/purple/gray cottony growth on leaf undersides only; distorted leaves or corn tassels; defoliation | Remove plant debris; choose resistant varieties; ensure good air circulation; avoid overhead watering |
| Flea beetles | Insect | Numerous tiny holes in leaves | Use row covers; mulch heavily; add native plants to invite beneficial insects |
| Stinkbugs | Insect | Yellow/white blotches on leaves; scarred, dimpled, or distorted fruit/pods; shriveled seeds; eggs, often keg-shape, in clusters on leaf undersides | Destroy crop residue; handpick (bugs emit odor, wear gloves); destroy eggs; spray nymphs with insecticidal soap; use row covers; weed; till soil in fall |
| White mold | Fungus | Pale gray, “water-soaked” areas on stems, leaves, and other plant parts that enlarge and develop white, cottony growth, later with black particles; bleached areas; crowns/ fruit rot; plants wilt/collapse | Destroy infected plants; ensure good air circulation; water in morning; weed; destroy crop residue; rotating crops on 5-year or longer cycle may help |
- ‘Churchill’ is an early maturing plant, adaptable to most climates.
- ‘Diablo’ is known as a heavy producer.
- ‘Falstaff’ has a red/purple hue that holds when cooked
- ‘Jade Cross’ is a high-yield compact plant, resistant to some diseases and known for its tolerance for hotter weather.
- ‘Oliver’ is an early-maturing variety with a shorter growing season requirement (80–90 days).
- ‘Long Island Improved’ is an heirloom and a compact plant that prefers a cool summer.
How to Harvest Brussels Sprouts
- Sprouts mature from the bottom of the stalk upwards. Harvest sprouts from the bottom when they reach about 1 inch in diameter.
- If desired, after a moderate frost, pull up the entire stalk, roots and all. (Remove leaves first.) Then hang stalk upside down in a cool, dry basement or garage or barn.
- Store stalks (no roots) for about 1 month in a root cellar or basement.
How to Store Brussels Sprouts
- Do not wash the sprouts before storing them, only right before use.
- Keep fresh-picked sprouts in a plastic bag for up to 5 days in the refrigerator.
- In 2013, a team of scientists and school children lit an 8-foot-tall Christmas tree in London with the energy from 1,000 brussels sprouts (a total of about 62 volts).
We prefer roasted sprouts—they have a lovely carmelized flavor!

