Cannas are among the most colorful summer bulbs—as flamboyant as their tropical American ancestry—with ruffled spikes tapering to refined buds.
About Cannas
The gorgeous canna boasts immense, often-veined, paddle-shaped leaves and sheathing leafstalks in shades of green or bronze—and flashy blooms that stand tall on their stems. With their great reedy canes and palmy foliage, cannas would be magnificent even if they never bloomed. However, they keep pumping out colorful flowers from late spring or early summer to frost. When most flowers can’t take the heat of late July and early August, cannas thrive.
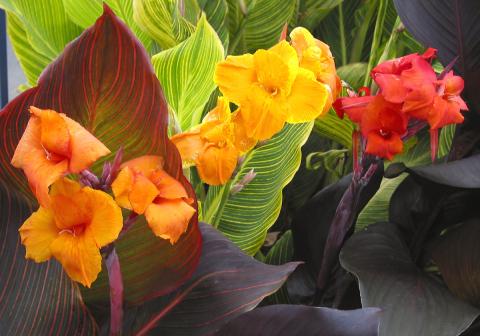
Their flowers come in many bright colors—red, orange, yellow, and pink—and their foliage also offers options—green, bronze, and variegated.
The Captivating Canna
Plant cannas as a tall border; they are even perfect for narrow spaces. The plant looks fantastic when backlit by a setting sun. Or, make cannas the focus and hero of large patio pots filled with super bright annuals. Liven up plantings near water features or boggy areas where these cannas will happily thrive. You can even grow them in large containers indoors near brightly lit windows.
Mix cannas with grasses, lantana, zinnias, snapdragons, elephant ears, salvia, periwinkles and more. Cannas are planted both as eye catching focal points and as small, unsuspecting accents. Not only are cannas colorful but their contrasting foliage can create some interest in the garden.
When to Plant Cannas
- Plant outdoors in late spring and early summer. Soil temperature must be 60°F (15°C) or warmer. (If your gardening season is short, cannas can be started in pots indoors or in greenhouses.)
- Some people ask how to determine soil temps: Check online for state extension websites that publish this information for your state. Or, dig a small hole two inches deep and insert an old-fashioned mercury thermometer into your soil. Or, buy a soil thermometer at local nursery or hardware store.
- We always plant around the same time that we put tomato plants in the ground. See our Planting Calendar for tomato-planting dates in your region.
- Cannas planted in USDA Hardiness Zones 8 and warmer—which don’t experience particularly harsh winters—can be left in the ground all winter. In Zones 6 and colder, you’ll need to dig up your canna rhizomes in late fall after your first killing frost if you want to grow them again next year. In Zone 7, it’s a bit of a toss up: add a layer of straw or leaf mulch to protect your cannas, or dig them up to be safe. See the USDA zone map.
Choosing and Preparing a Planting Site
- Exotic, tropical creatures, cannas need lots of sunshine and fertile, moist soil—but you don’t have to pamper them.
- A position in full sun is best, though cannas tolerate partial shade. Choose a site with at least four hours of direct sunlight. Morning or afternoon sun is ideal.
- Before planting, loosen the soil to a depth of 12 to 15 inches, then mix in a 2- to 4-inch layer of compost.

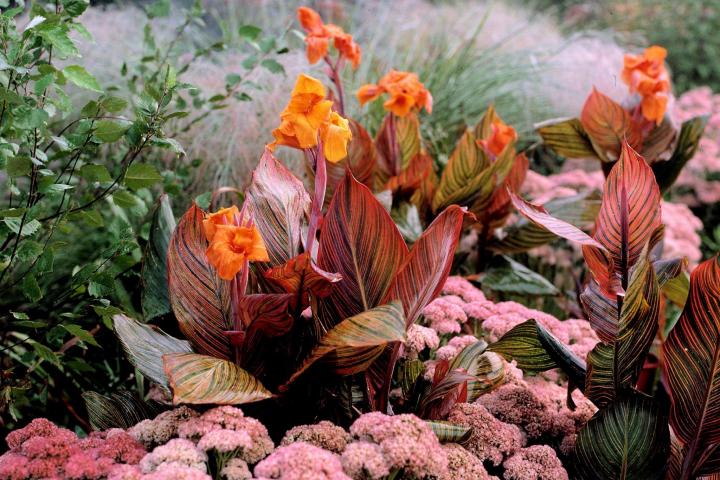
Canna ‘Tropicanna’® planted among sedum ‘Autumn Joy’ makes for a stunning display in late summer.
How to Plant Cannas
- Turn-of-the-century gardeners so loved cannas that they grew them from seed, but this isn’t easy; better to leave propagation to experts and plant canna rhizomes instead.
- Cannas are commonly referred to as a “bulb” although they are not a true bulb; cannas multiply beneath the soil from a fattened extension of the stalk called a “rhizome.”
- If you grow from seed, be aware that the germination rate is low and the seeds need to be filed or given an acid bath to break down their hard coat.
- Dig a hole 2 to 3 inches deep and set the rhizome in the hole, eyes up. (And if you happen to plant with the eyes facing to the side or down, no worries! The new growth will easily find its way toward the sun.) Cover the rhizome with one to two inches of soil. Tamp firmly. Water thoroughly.
- Space rhizomes 1 to 4 feet apart.
- Cannas are slow to sprout and do not require much water until you begin seeing signs of growth. Sometimes is takes as many as three weeks for cannas to sprout. Once sprouted, water cannas at least once a week by slowly soaking the area around the roots.
- During the hottest weeks of the summer, give the plants a good soaking drink of water every other day.
How to Care for Cannas
- Full foliage color develops when days are warmer (59ºF or more).
- With masses of broad fleshy leaves, cannas do best with a good supply of water, so water the plants during the summer if the rainfall is less than 1 inch per week. Water freely in a dry spell.
- Cannas are not picky when it comes to fertilizer. Cannas easily bloom all summer without much effort. But for those of you who want to give your plants an extra boost, apply a 5-10-5 or 10-10-10 in the spring and, if you wish, two more times during the growing season. Fish emulsion fertilizer is a little higher in nitrogen, but is a fantastic organic alternative for feeding your cannas. Higher nitrogen fertilizers tend to increase the average height of cannas. If you have rose food or tomato food on hand, both are great options for cannas, too.
- Keep a thin layer of mulch around cannas to help retain moisture as well.
- Stake tall varieties if needed.
- As flowers fade, deadhead to promote continued flowering.
- After the flower stem has been deadheaded several times and is no longer producing flowers, cut the flower stem and any attached foliage to the ground, as this can help nearby cannas get more light and flower themselves. (If you prefer, just cut the stem back to the foliage, which will last until the first frost.)
Autumn Care
- Cut plants back to 4 inches in late autumn to prepare for next summer’s show.
- After the first autumn frost kills the foliage, you can remove the stems and leaves. See your local frost dates.
- In the deep South of the U.S., let cannas grow without moving them until the clumps grow very matted. Every 3 to 4 years in the winter, dig up the clumps, separate the roots, and plant them in well-enriched soil.
- In colder climates (Zones 6 and colder), dig up the rhizomes before the first hard freeze (28°F) occurs. See Harvest/Storage (below) for instructions.
- Cannas aren’t prone to disease. Rust, fungal leaf spot, and bacterial blight may happen when cannas are kept too wet and crowded.
- Cannas rarely have issues with pests, though caterpillars can munch on leaves. Slugs, snails, spider mites, and caterpillars are most common culprits.
- Bean yellow mosaic and tomato spotted wilt viruses can occur.
It’s worth noting that because some cannas have large soft leaves, it’s a good idea to position plants out of the wind so they’re not vulnerable to damage.
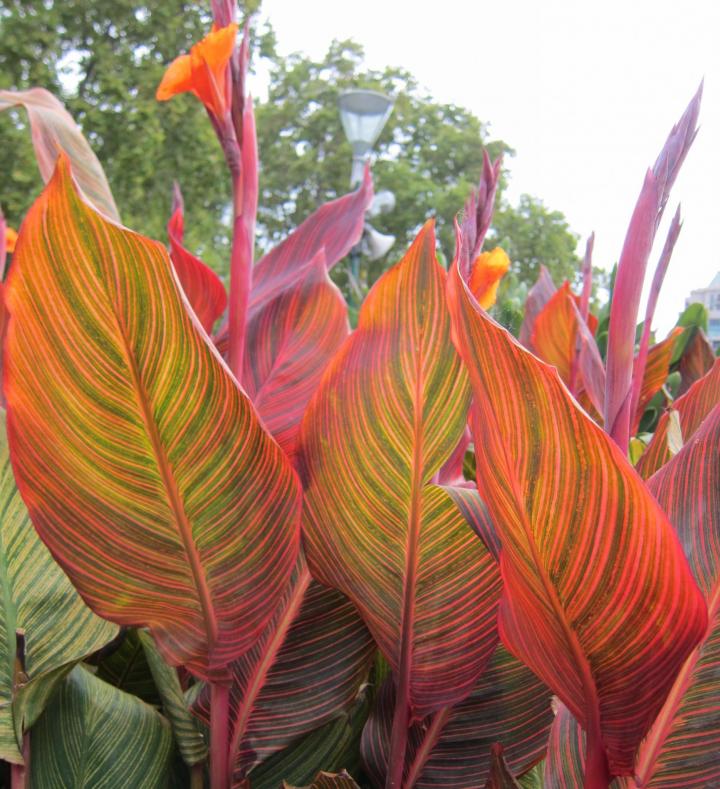
- For a tall canna, the Canna Tropicanna® is a popular choice. Growing to a height of 48 to 72 inches, ‘Tropicanna’® boasts gorgeous tangerine, iris-like blooms and exotic bronze foliage. Plant in the back of your garden bed or in large containers for a dramatic statement on your porch or patio. Don’t worry about deer; they tend to stay away from easy-to-grow cannas.

Credit: Canna Tropicanna®
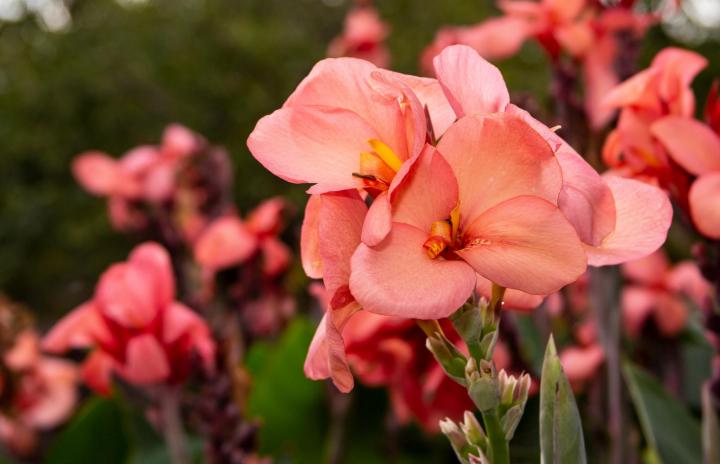
- A medium-size gem is the rich, deep pink ‘Los Angeles’, which has a large floret and opens out so that you can see the face. The plant grows from 42 to 60 inches tall, blooming from June to August.

Image: Credit: Mick49/Shutterstock
As well as the medium- to tall-size canna, you can find smaller “dwarf” sizes and dramatic “giant” sizes!
- Dwarf cannas stay under 3 to 4 feet tall and are easy to fit into our downsized modern gardens. The ‘Picasso’ is a real attention-getter with bright yellow flowers and deep red leopard-like spots; it blooms from July to frost. The ‘Wyoming’ has dark burgundy stems and lush orange flowers that brings life to a quiet bed from mid-summer until frost.
- Interested in a giant canna? One of the most popular is the ‘Musifolia’ which grows up to 8 feet. Its leaves are the size of a banana plant and creates dramatic statement and very tropical background!
Digging up Canna Rhizomes in the Fall
Do I need to dig up my cannas?
It’s only necessary to dig up cannas if you live in a region that experiences harsh winters. Generally, this means USDA Hardiness Zones 6 or colder, although Zone 7 may also occasionally experience canna-killing winter temperatures. In Zone 8 and warmer, cannas can be left in the ground year-round.
Cannas will need to be dug up in the fall and brought inside for the winter, to be replanted again in the spring. Alternatively, if you have grown them in pots, you can bring the pots into a garage or basement.
When to Dig up Cannas
Do this job after the leaves have yellowed, died back, or have been killed by frost, but before a hard freeze occurs. Most gardeners dig up their bulbs immediately after the foliage has been killed by the first light frost in fall or early winter. (It is not necessary for cannas to be frosted prior to digging, but it is recommended.)
How to Dig up Cannas
- Get out the pruning shears. Cut back all of the foliage 2 to 3 inches from the top of each rhizome.
- Dig up the roots with a shovel or garden fork about one foot away from the stem so that the rhizome is not damaged. With your hands, gently loosen the soil and lift out the clump. Shake off the dirt and cut off the foliage. Divide clumps into 3 to 5 eye bulbs/rhizomes.
- If possible, it’s ideal to cure them bulbs for a few days to toughen them up and resist rot. A garage or closet makes for a good place to cure the bulbs.
- Bring rhizomes inside to store. Wrap individual bulbs in newspapers or paper bags with a small amount of dry growing medium, such as peat moss to absorb moisture and prevent rot. Bulbs should not touch each other. Store cannas over the winter in a dry place that doesn’t drop below 40°F / 4°C (often an attic or basement).
- Check on your bulbs a couple times over the winter to make sure they don’t dry out. Sprinkle with sand or peat moss as needed. If you find rot, trim away the bad piece or discard. Keep in mind that there will always be some bulbs that don’t make it no matter what you do. Perhaps 80% survive.
Keep plants in pots dry until you move them outside for the summer. Plants can be replanted outside or moved outside when nighttime temperatures are consistently above 50°F / 10°C, typically after the tulips have bloomed in northern areas.
When replanting, make sure that each divided piece has at least one node, which is where new leaves will grow from in following seasons. Then plant 4 to 5 inches deep and 1 to 4 feet apart. They will bloom in 10 to 12 weeks.
- Cannas’ bright flowers may attract hummingbirds.
- Sometimes called “canna lilies,” these perennials are unrelated to true lilies.
- The name canna comes from the Greek word kanna. It means reed or reed-like plant.
Flowers are words which even a babe may understand.
–Arthur Cleveland Coxe, American poet (1818-96)


