Just a few sweet potato plants can produce a generous harvest of this nutritious, sweet-tasting root vegetable. More commonly grown in the South because they require warm weather, northern regions can have success with select varieties. Here’s how to plant, care for, and harvest sweet potatoes—plus, discover best varieties.
About Sweet Potatoes
Sweet potatoes are a member of the morning glory family. They are not related to regular potatoes, which are in the nightshade family. The edible portion of a sweet potato is called a tuber.
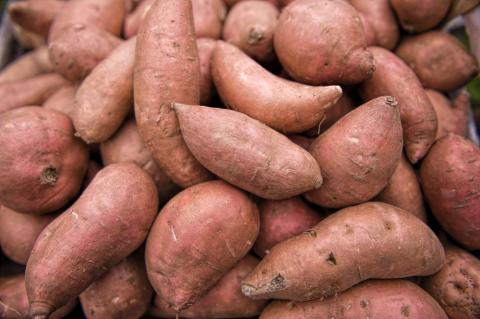
The root vegetable has deep-orange flesh and a copper skin jacket. Sweet potatoes are commonly served cooked, in whole or mashed form, or roasted. Or they are used as pie filling.
 Photo Credit: Brent Hofacker/Shutterstock
A tropical plant, sweet potatoes are a very undemanding crop as long as they have four months of warm weather and warm soil; they are drought- and heat-tolerant and have few pests or diseases. Though traditionally more of a Southern crop, there are many short-season varieties of sweet potato today. They will grow in the North (even parts of Canada!), when grown in sandy soil or raised beds that are mulched with black plastic to keep the soil warm.
Relatively low in calories, sweet potatoes are very nutritious, a top source of beta-carotene, and also contain some protein, calcium, iron, vitamins A and C and other minerals. They can be stored longer than winter squash.
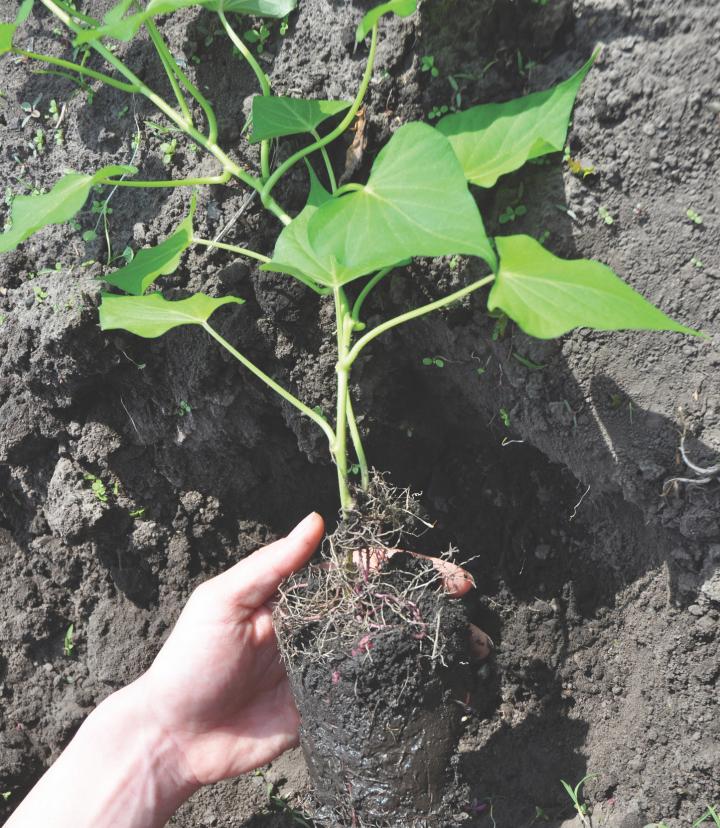
- Sweet potatoes are not grown from seed. They’re grown from slips, sprouts grown from existing sweet potatoes. Slips are available at local garden centers, nurseries, from local farmers (such as farmers markets), or from a mail-order companies. Or, you can start your own (see methods below).
- Before ordering slips, make sure that you have a long enough growing season. Most varieties will take about 90 to 120 days to mature. See your frost dates and length of growing season. Also, make sure you time your order with your planting dates.
- You won’t plant slips until 3 to 4 weeks after the last spring frost, once nighttime temperatures have reached at least 55°F (13°C). The trick is to plant them early enough for them to mature properly, but not so early they get killed by a late spring frost.
- When you receive the slips, unpack them right away. Stick the roots in water for a day or so, and they’ll perk up.
 Image: Sweet potatoes are grown from slips—sprouts grown from existing potatoes! Credit: Lex20/Getty Images.
Can I start my own plants?
Yes, you can start your own plants instead of buying slips but it’s more work. In the fall, look for unblemished, smooth, organic sweet potatoes at the store or farmers market. Just be sure to inquire about the variety.
- Store the sweet potatoes in a cool (55°F), dark place until mid-April or about 90 days before the last spring frost.At this time, place the sweet potatoes in containers on top of 3 inches of light, organic, well-draining soil. Leave space between each one.
- Lightly cover with a few inches of additional soil. Water now and as needed to keep soil damp, not soggy.
- Maintain the soil and the room at 75°F to 80°F in sunlight. Use a heating map if necessary.
- In 4 to 6 weeks, the slips will be 6 to 12 inches long, with leaves and roots.
- Remove the slips from the sweet potatoes, roots attached. If no roots form, remove the slip and place it in water; roots will appear in 1 to 2 weeks.
- If it is too soon to plant, stand the slips in potting mix or sand and keep moist until planting time.
Hardening Off
Harden off the slips over 1 to 2 weeks by exposing them to filtered sunlight. If you purchase slips, plant them as soon as conditions are right.
Preparing a Planting Site
- Choose a sunny spot with well-drained soil. Sweet potatoes aren’t too picky, but they do prefer soil on the sandier side. They need plenty of air space in the soil for roots to reach down. If your soil is clay, rocky, or compacted, consider raised beds.
- Plan 3 feet between rows ensures so that there is enough space for vines to run.
- Mix in organic matter to a depth of 8 to 10 inches. Use fertile, well-drained soil. Add compost, perlite, and/or coconut coir to help build loamy soil and retain moisture. Avoid adding animal manure, including pelleted chicken manure. It can result in spindly and/or stained roots.
- If you live in the northern US or Canada, consider covering the growing area with black plastic or fabric mulch about 3 weeks before planting. This helps to warm the soil.
- Create raised mounds 6 to 8 inches tall and about 12 inches wide.
Planting the Slips in the Ground
- Plant the slips on a warm, overcast day, when the soil temperature has reached 60°F.
- Break off the lower leaves, leaving only the top ones.
- Set the slips deep enough to cover the roots and the stem up to the leaves. Sweet potatoes will form on the nodes, 12 to 18 inches apart.
- Water with a high-phosphorus liquid fertilizer, then water generously for 7 to 10 days to make sure that the plants root well.
See more tips for growing sweet potatoes.
- Side-dress the sweet potato plants 3 to 4 weeks after transplanting with 5-10-10 fertilizer. If you have sandy soil, use more.
- Weed the sweet potato beds regularly starting 2 weeks after planting.
- Avoid deep digging with a hoe or other tool that disturbs the feeder roots.
- Water regularly, especially during mid-summer. Deep watering in hot, dry periods will help to increase yields.
- Do not prune sweet potato vines; they should be vigorous.
- Late in the season, reduce watering to avoid cracking of the root’s skin in storage.
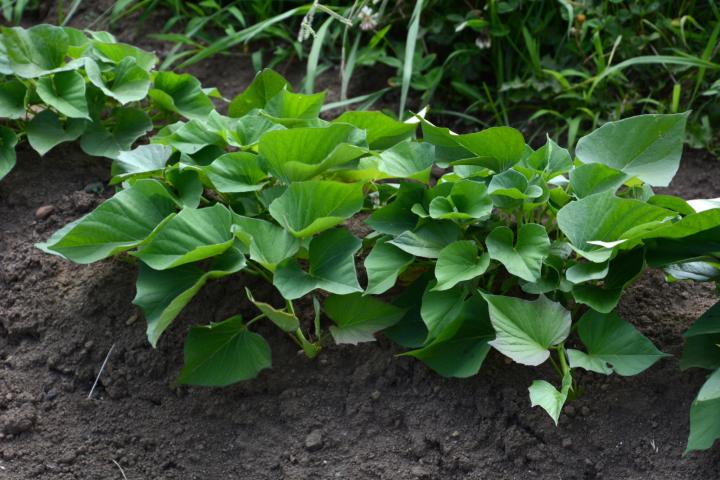
 Image: We thinks sweet potatoes make a nice ground cover, too! Credit: Getty Images.
- Flea beetles
- Stem rot (Fusarium wilt)
- Sweet potato scurf
- White rust
- Whiteflies
The fastest-growing sweet potato varieties have orange flesh, but you might also consider varieties with white, yellow, or even purple flesh. Note that orange-flesh varieties cook up moist; white and yellow sweet potatoes become creamy; purple sweets are dry and starchy.
- ‘Beauregard’ (90 days) originally comes from Louisiana, but grows well in the north, too. It has dark red roots, dark orange flesh, and stores well.
- ‘Centennial’ (100 days) is the leading variety in the U.S. It is carrot-colored and has a good storage life. It is also a good producer for the North.
- ‘Georgia Jet’ (90 days); Red skin covers moist, deep orange flesh. Extremely fast-growing type; good for the North.
- ‘Jewel’ (100 days) has copper-colored skin and orange flesh; disease-resistant; stores well.
- ‘Stokes’ offers a vibrant purple color and is full of extra health benefits; cooks well in savory dishes and mashes.
- ‘Vardaman’ (110 days) is a bush type and good for small gardens; it has unique blue/purple foliage, golden skin, and reddish-orange flesh; stores well.
- ‘White Yam’ (100 days); also called ‘White Triumph’. White skin covers dry white flesh. One of the oldest sweet potato varieties. Has compact vines.
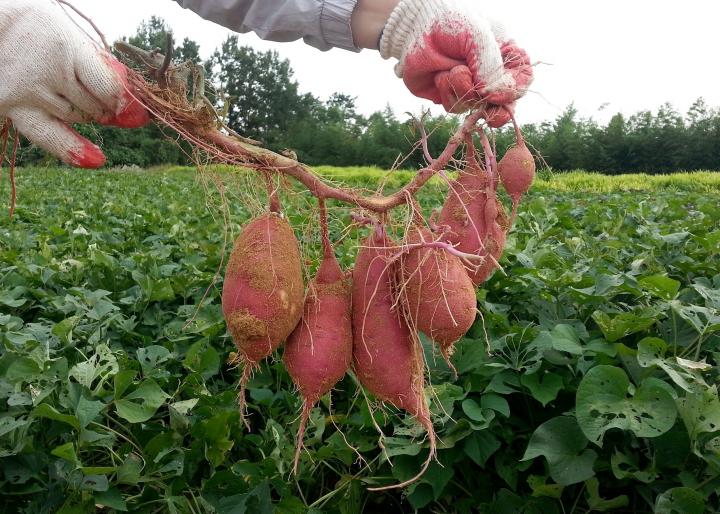
- You can start digging up the potatoes as soon as they are big enough for a meal.
-
Harvest when the leaves and ends of the vines have started turning yellow or about 100 days from planting.
- Loosen the soil around each plant (18 inches around, 4 to 6 inches deep) to avoid injuring the root. Cut away some of the vines.
- Pull up the plant’s primary crown and dig up the roots by hand. Handle the sweet potatoes carefully, as they bruise easily.
- Shake off any excess dirt; do not wash the roots.
- Complete harvesting by the first fall frost.

Curing Sweet Potatoes
- Curing sweet potatoes gives them that sweet taste and also allows a second skin to form over scratches and bruises.
- To cure, store roots in a warm place (about 80°F) at high humidity (about 90%) for 10 to 14 days. A table outside in a shady spot works well. Arrange sweet potatoes so that they are not touching.
- After curing, discard bruised sweet potatoes, then wrap each one in newspaper.
- Carefully pack in a wooden box or basket. Store in a root cellar, basement, or the like with a high humidity at 55°F to 60°F. The roots should last for about 6 months.
- Handle sweet potatoes carefully; they bruise easily.
- Sweet potatoes are a very healthy root vegetable, and they provide many benefits. Here’s why you should eat sweet potatoes.
- They were used in folk remedies to treat asthma, night blindness, and diarrhea.
- Not only are sweet potatoes not yams, which are related to grasses and lilies, they’re also not related to regular white potatoes, which belong to the nightshade family, versus the morning glory family. Potatoes’ edible portion is a tuber; sweet potatoes are root vegetables.
Check out our ten best sweet potato recipes!
To the cook, sweet potatoes are easier than pie (or sweet potato pie!).
- They can simply be scrubbed, poked with a fork in a few places, and baked at 400°F for 35 minutes to one hour, until they give a bit when you squeeze them in your pot-holder-protected hand.
- In the microwave, a whole sweet potato baked on high should be ready in 4 to 6 minutes. It may still feel firm when done; let it stand about 5 minutes to soften.
- Sweet potatoes can also be steamed whole (cleaned and unpeeled) for about 40 minutes or until tender, or cooked whole (cleaned and unpeeled) in boiling salted water for about 35 minutes. (Boiling reduces the flavor considerably.)
- Immerse cut raw sweet potatoes in water until you’re ready to cook them; they will darken otherwise.
As a general rule, don’t substitute sweet potatoes for regular potatoes in recipes; the two aren’t related. Sweet potatoes don’t hold together the way potatoes do, and their strong flavor can overwhelm a dish meant for a milder potato taste. Sweet potatoes are also not related to yams. But they make a fine substitute for pumpkin, especially in desserts.


