
After Saturday night’s festivities and the cause of last week’s cupcake extravaganza, I was a little sluggish at Sunday’s final bread class.
We concentrated on whole-grain breads, such as semolina, Swiss rye, seeded rye, and pumpernickel, and despite being a little, um, dehydrated, I think I did well, surprising myself by getting all four doughs together before noon.
It was at this point that I realized I had accomplished my goal for this class, which was not to effectively knead bread while suffering from a margarita headache, but to become comfortable enough with the process that I could confidently dive into recipes and know instinctively what to do if things went wrong (or underslept). I’m almost there, and not a moment too soon, because the instructor dug up a recipe for Russian Black Bread for me with about 20 ingredients and it’s calling to me. No rest for the weary, or at least certifiably insane, I suppose.
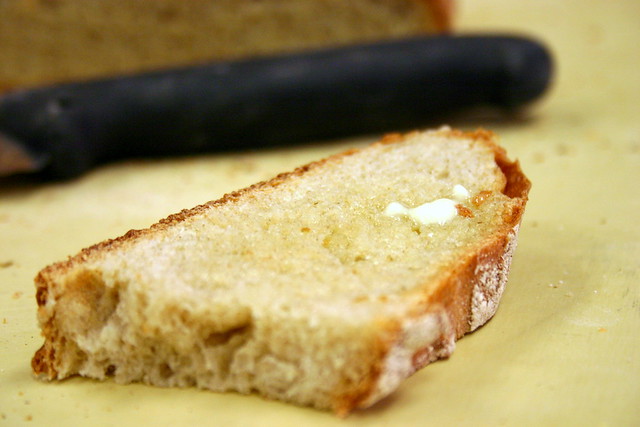
As there are few things better on earth than a grilled cheese sandwich on seedless rye with a slice of tomato and arugula, I was pretty excited for my take-home bounty and while it did not disappoint, I have to confess that the next day, just the appearance of all those loaves of bread making it impossible to tightly shut our freezer made me feel a bloated, too. Is it possible to have a bread hangover? Fifteen hours of bread baking over three weeks is quite a bit, and while I wouldn’t trade the class or what I’ve learned for anything, those leafy greens and roasted squash are looking mightily more appealing these days. When this phase passes, as I am certain it will, I’m certain we have enough stashed away to get us through the long winter and then some.
As promised last week, a summary of some odds and ends notes I had scribbled in the margins of the recipes, things I hope will come in handy for you, too in your doughy endeavors.
[a notes 1-11]
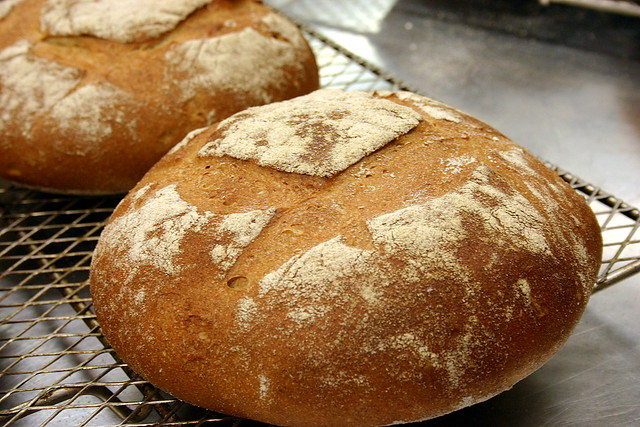
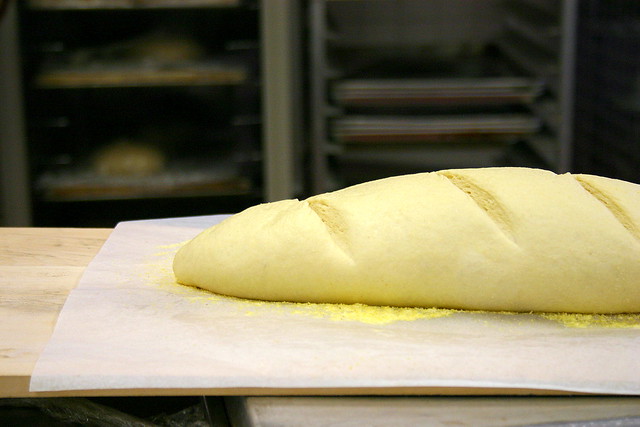
- Non-pan, free-form breads are slightly stiffer than their formed loaf siblings, so they need to be slashed to control their expansion. (I mentioned last time that for pan breads, the slashing is optional, and not very common.) The way you slash them and what tools you use are up to you; a traditional French one is called a lame but a good serrated knife works almost as well. Try to hold the knife at a 30-degree angle to the bread, and cut it quickly and confidently, just once on each slit, holding onto the parchment paper or pan the bread rests in case it budges.
- Free-form breads also benefit from having steam added in the beginning of their baking time to keep their crusts from setting before they are done expanding. Fancy-shmancy bread ovens have buttons you can push to do this, and then remove the moisture (you should do it once every five for the first fifteen) but at home, you can either use a spritzer of water or put a baking sheet in the bottom of the oven while it heats and add cold water to it when you put the bread in. Of course, then you will have to remove it after 15 minutes, which is not the easiest thing since it’s flat, wobbly and steaming hot. Suffice it to say I’ll just be using a spritzer.
- Free-form breads also benefit from being baked directly on a bread or pizza stone. If you buy one, don’t wash it, just brush the crumbs off. Should you (like, ahem, some people) end up with one with layers of old pizza stains on it, you can sand it to get a new surface.
- Often, when using commercial machines in bakeries to mix and knead dough (and you consider doing the same at home if you use a Kitchen Aid or Food Processor), it’s very easy to over-knead the bread because they are so vigorous. (With your own hands, it’s nearly impossible “unless you are He-Man or something,” Chef Loren says.) To compensate, a slightly cooler temperature is often used for the water the yeast goes into, more like 85 degrees instead of the standard 110.
- By hand, there are three methods to know if you are done kneading your bread. The first is resiliency, something you’ll come to recognize after you’ve made a few breads. The second is the windowpane method, in which a small piece is stretched thin between your two hands and it should have almost a windowpane appearance, where the light comes through. The third is temperature, as the bread dough’s temperature rises a bit when it’s properly kneaded, but here my notes fail us all as I did not write it down. I use method one. If you’re worried you haven’t kneaded enough, just do it a little longer. It won’t hurt it.
- Whole-grain flours don’t have the wheat glutens of all-purpose and bread flours that make for that fluffy white bread Americans like, so they’re usually used in combination with other flours. Each recipe varies in its ration of whole grain to regular flour according to the bakers preference, really.
- Go ahead and store your risen or not-yet-risen doughs in the freezer. Wrap it twice in well-sealed plastic, giving in a wee bit of room as it will expand slightly before it gets too cold to. It’s good in there for up to three months. When you want to use it, take it out and bring it to room temperature, letting it rise, and continue where you left off.
- There are all sorts of cooky things you can add to your bread doughs to make them lovelier. Vitamin C is one of them. You can actually crush a tablet into your dough. It’s supposed to preserve the flavor and deter mold. Another one is powdered ginger, which helps the yeast do its thing. You’d add about 1/4 tsp. per recipe of either. The flavor should not be detectable. There are also bread enhancers (not to be confused with bread flours, but I think I’ve told this story of my stupidity already) which have many of these extra in them, and can be bought at specialty food stores. How much you add to each cup of flour or dough depends, so just check the instructions.
- When sprinkling cornmeal on your baking surface or flour decoratively on the top of a loaf, don’t worry about putting too much on. In fact, be as generous as possible. The extra usually falls or can be brushed off, but you can’t compensate later for too little.
Updates: Pumpernickel bread recipe added below.
This recipe is for a lightly-flavored pumpernickel bread. In the years since I have made it, I have found my dream recipe, so to speak, for a heavy, dark Russian Black Bread (a more flavorful cousin of Pumpernickel) and provided it for an article I did for NPR. That recipe is over here.
Pumpernickel Bread
Adapted from Techniques of Bread Baking 1 at the ICE
1 cup warm tap water, about 100 degrees
2 1/2 teaspoons (1 envelope) active dry yeast
2 cups unbleached, all-purpose flour
1/2 cup whole wheat flour
1/2 cup whole grain rye flour
1 tablespoon non-alkalized cocoa powder
2 teaspoons salt
1 tablespoon unsulphered molasses
Cornmeal for bottom of loaf
Heavy cookie sheet, jelly roll pan or baking stone
1. Place water in a mixing bowl, sprinkle yeast on surface and whisk, letting it stand for five minutes. Add molasses. Stir in flours and remaining ingredients. Knead dough by hand to form a smooth, elastic, soft dough.
2. Transfer dough to an oiled bowl and turn dough over so top is oiled. Cover bowl with plastic wrap and allow dough to rise at room temperature until doubled. If you wish to interrupt the process, let the dough begin to rise, then punch down, cover tightly and refrigerate. To proceed, bring dough back to room temperature until it begins rising again.
3. To shape loaf, turn risen dough out on to floured work surface (you may need the help of a scraper). Press dough with palms of hands to deflate. Gently knead, the shape dough into a sphere by tucking edges under and in toward the center all around the bottom. Invert the dough into a round basket lined with a heavily floured napkin or tea towel so ends are on top. Cover with plastic wrap and allow to rise until doubled.
4. When loaf is almost doubled, preheat oven to 500 degrees and set rack at the middle level. Place baking pan or stone on rack.
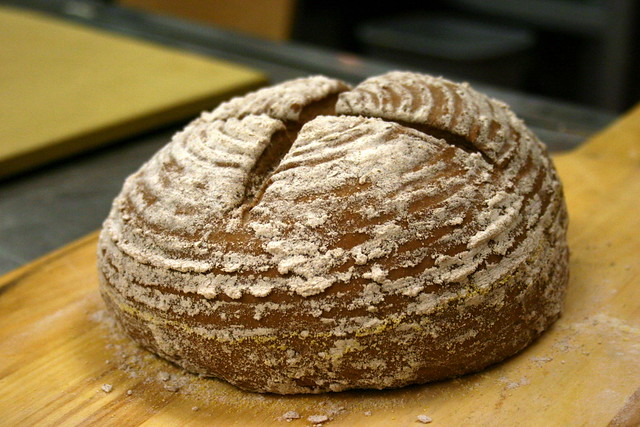
5. Sprinkle cornmeal on top of loaf and invert it onto a cardboard round or peel. Use a razor blade held at a 30-degree angle to the loaf to slash across the top of the loaf. (Deb note: I made an X in the bread pictured here.) Slide risen loaf from the cardboard or peel onto the pan. Immediately lower oven temperature to 450 degrees. Bake the loaf for about 40 minutes (Deb note: you’ll probably need much less time, or to lower the oven temperature to get it to finish baking) or until internal temperature of the loaf reaches 210 degrees. Cool the loaf on a rack and do not cut until it is completely cooled.
Raisin Pumpernickel Bread – After the dough has risen for the first time and before shaping the loaf, knead in 1 cup dark raisins by hand.
If you don’t plump them first in very hot water for several minutes, they will burn in the oven.

