Asparagus is one of the first plants that greets us in springtime! It’s a perennial, which means that once it gets established, the tender spears will return year after year. In addition, its ferny foliage makes an excellent ornamental. Here’s how to grow asparagus—from planting through harvest!
About Asparagus
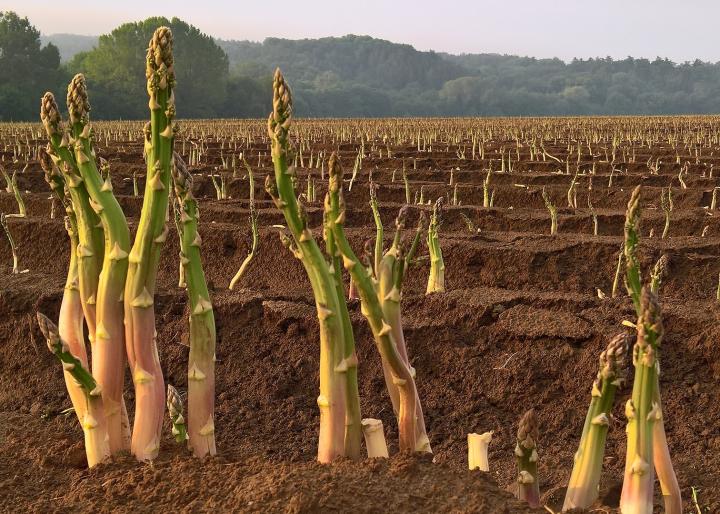
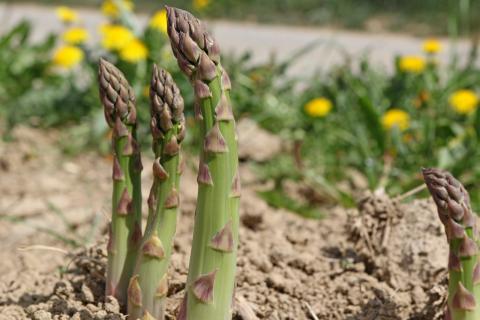
Asparagus can be grown in most temperate regions, but grows more robustly in cooler areas with long winters. The edible part of the asparagus plant is the young stem shoot, which emerges as soil temperatures rise above 50°F (10°C) in spring.
The most important thing to know about asparagus is that you really should not harvest it during the first couple of seasons. These plants need to be allowed to get established before you can harvest sustainably. The patience is well worth it, though, as asparagus beds can be productive for 15, 20, sometimes up to 30 years.
Because asparagus stays productive for so long, it’s important to plant the best variety available for your area. (See recommended varieties below.)
If you are starting asparagus for the first time, we would plant 5 to 10 asparagus plants per person (15 to 30 feet of row).
How Long Does It Take to Grow Asparagus?
As said above, newly-planted asparagus plants may take 2 to 3 years to truly get started and produce, so patience is needed! After they’re established, however, asparagus can be productive for decades.
In addition, asparagus plants are fairly fast producers, sending up new spears every few days for a few weeks in the spring. The plant produces ½ pound of spears per foot of row in spring and early summer, so we think it’s definitely worth the wait.
When to Plant Asparagus
- Plant asparagus crowns in the early spring, as soon as the soil can be worked. Many gardeners plant at about the same time as potatoes go in the ground.
- Asparagus is usually grown from 1-year-old plants called “crowns,” but it can also be grown from seed. Starting with asparagus crowns, however, eliminates the year of tedious weeding that comes with starting from seed, and will speed up production overall.
- A few varieties, such as open-pollinated ‘Purple Passion’ and hybrid ‘Sweet Purple’, can be grown from seed. Start seeds indoors in spring and set out the seedlings when they are 12 to 14 weeks old, just after your last spring frost.
- Soak seeds in water for up to 24 hours before sowing.
- Sow seeds in moistened peat or seed-starting soil in flats or peat cups.
- Once plants reach 12 inches in height, harden them off outdoors for a week.
- After the last spring frost, transplant the young plants to a temporary garden bed. Once they mature in the fall, identify the berry-less male asparagus plants and transplant them to your permanent planting site, removing the less-productive female plants.

Choosing and Preparing a Planting Site
Given that asparagus is a perennial plant that comes back year after year in the same spot, it’s important to select a proper planting site where it will thrive.
- Choose a site that gets full sun.
- Place the asparagus bed toward the edge of your garden, where it will not be disturbed by the activity of planting and re-planting other areas.
- Ensure the bed will drain well and not pool water. Asparagus does not like to have its roots get too wet. If you do not have a site with good drainage available, consider growing asparagus in raised beds instead. Learn how to make a raised garden bed here.
- Asparagus thrives in neutral to slightly acidic soil (pH of about 6.5).
- Eliminate all weeds from the planting site, digging it over and working in a 2- to 4-inch layer of compost, aged manure, or soil mix. (Learn more about soil amendments and preparing soil for planting.)
- The soil should be loosened to 12 to 15 inches in depth to allow the asparagus crowns to root properly and not be disrupted by rocks or other obstacles.
How to Plant Asparagus
- Plant crowns deeply to protect them from the cultivation needed for annual weed control.
- Dig a trench of about 12 to 18 inches wide and 6 to 8 inches deep. If digging more than one trench, space the trenches at least 3 feet apart.
- Soak the crowns briefly in lukewarm water before planting.
- Make a 2-inch-high ridge of soil along the center of the trench and place the asparagus crowns on top of the mound, spreading their roots out evenly.
- Within the trench, space asparagus crowns 12 to 18 inches apart (measured from root tip to root tip).
Once you get to this point, you can follow one of two planting methods: the traditional “little-by-little” method or the easier “all-at-once” method.
“Little-by-Little” Method:
Once the trenches are dug and the crowns are set out:
- Cover the crowns with compost and topsoil, burying the crowns 2 inches deep. Water in.
- As the season progresses and spears grow to be 2 to 3 inches tall, add 2 more inches of soil to the trench, being careful not to bury the spears completely.
- Once the spears again grow through the layer of soil, add an additional 2-inch layer of soil. Repeat this process until the trench has been filled to ground level. Depending on how deep you dug your trench, you may need to add soil 1 to 2 more times throughout the season.
- After you’ve filled the trench completely, mound the soil slightly to prevent water from pooling around the emerging spears.
“All-at-Once” Method:
- Some gardeners simply fill in the trench with soil and compost all at once. While it’s thought that the traditional method results in stronger plants overall, gardeners don’t typically have any issues result from the “all-at-once” method, either. As long as the soil is fairly loose, the spears won’t have a problem pushing through to the surface.
Learn how to plant and grow an asparagus bed in our video:
How to Grow Asparagus
- When the trench is filled, we would recommend adding a 4- to 6-inch layer of mulch.
- The biggest issue with asparagus is managing weeds during the first two years. Asparagus should not have its roots disturbed, so you’ll need to gently hand-pull weeds, taking care not to disturb asparagus’ roots. Weeds will become less of an issue as the plants fill in. Mulch around the plant with compost or grass clippings to help retain soil moisture and reduce weed growth.
- During the first 2 years after planting, asparagus plants need 1 to 2 inches of water per square foot per week. If you are not receiving adequate rainfall, you will likely need to water. Use drip irrigation if possible.
- Asparagus thrive on a steady supply of plant food. Consider an organic fertilizer during the growing season. Follow instructions on the label of whatever product you use.
Before Harvesting
- Do not harvest the spears in the first or second year (the plant needs time to grow out its root system), but cut down dead foliage in late fall and side-dress with compost.
- During the second year, side-dress with compost in spring and early fall and cut down dead ferns in late fall. Keep the bed thickly mulched.
- During the third year, the bed should be in full production, so you can start to harvest asparagus sparingly throughout the season.
Transplanting Asparagus
- If you must move asparagus, transplant the crowns in early spring when they are dormant or in late fall before the first fall frost (after foliage is cut back). Dig and lift crowns with a garden fork, being very careful not to disturb the roots. Divide the clump into two or more pieces. Water transplants. Do not harvest heavily in the following year.

One of the biggest concerns in the asparagus bed is simply weeds. Hand pulling should be done on a regular basis in spring and early summer. Cultivate lightly to avoid damaging emerging asparagus spears. The application of four to 4 to 6 inches of straw in summer also is effective in controlling weeds.
| Pest/Disease | Type | Symptoms | Control/Prevention |
|---|---|---|---|
| Asparagus beetles | Insect | Spears turn brown and bend in a hook shape; defoliation; damaged fruit/seeds | Remove beetles by hand; dispose of plant matter in the fall where eggs could be housed |
| Cutworms | Insect | Wilting; stems of young spears severed (“cut”) just above soil line | Watch for cutworms and remove by hand; clear away weeds and other plant matter. Find more cutworm prevention tips here. |
| Fusarium Crown Rot | Fungus | Yellow, stunted, wilted ferns; reddish-brown spots on lower stems, crowns, or roots; rotting spears | Destroy infected plants; avoid planting new asparagus nearby infected site for 5+ years; choose resistant varieties; disinfect tools to prevent spread; avoid overharvesting |
| Asparagus Rust | Fungus | Pale green spots on emerging spears become yellow/orange with concentric rings; reddish-brown blisters appear in summer, releasing rust-colored spores that turn black; brown ferns; defoliation; reduced vigor | Rust requires moisture to spread; avoid getting excess water on spears or ferns. Destroy infected plant matter; choose resistant varieties; ensure good air circulation; avoid planting new asparagus nearby |
- Asparagus is considered a deer-resistant plant, though deer may nibble on the tips of fresh shoots. A hungry deer will eat almost anything!
Asparagus plants are either male or female. Female plants produce berries; males plants do not expend energy on berries so they can be up to three times more productive than female plants. For this reason, growing male asparagus plants is often preferred.
- Gardeners in Zones 4 to 6 have a wider selection of varieties, including ‘Jersey Giant’, ‘Jersey King’, and ‘Jersey Knight’. Older varieties ‘Mary Washington’ and ‘Martha Washington’ may produce female plants, which are not as productive as the males.
- In colder climates, ‘Guelph Millennium’ and other varieties that emerge late often escape damage from spring freezes.
- In warmer climates, early and heat-tolerant varieties such as ‘Apollo’ and ‘UC-157’ produce well before the weather turns hot.
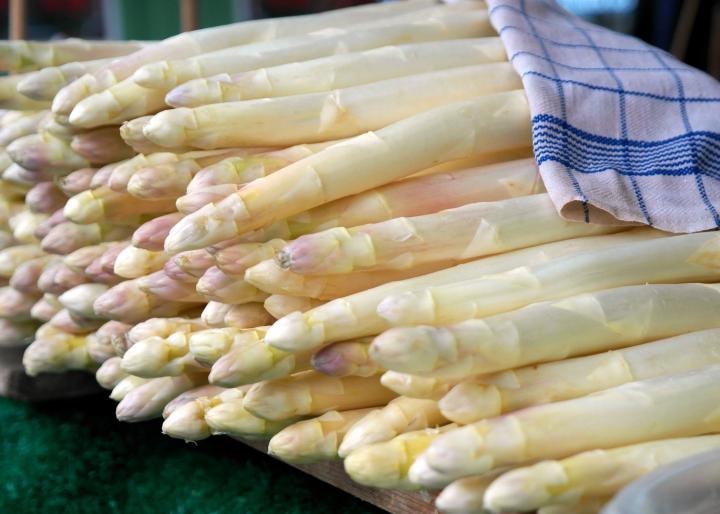
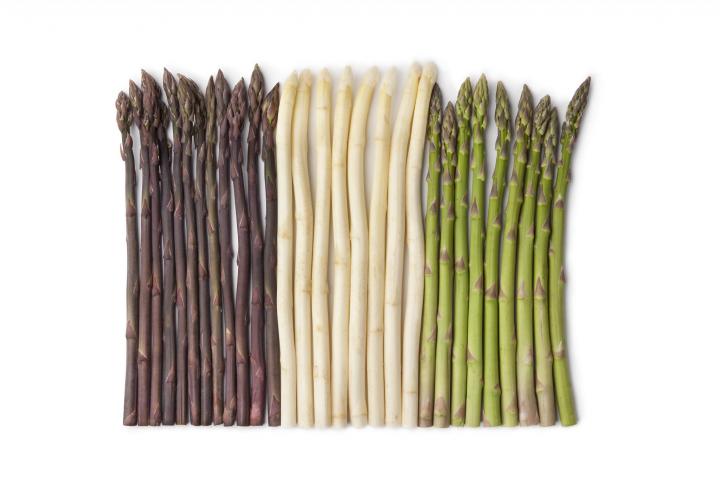
White asparagus is not a variety, but simply asparagus grown in the absence of sunlight to prevent chlorophyll from developing. White asparagus is slightly sweeter, but has less fiber than green asparagus.
Purple asparagus is bred to be purple in color, but turns green when it is cooked. Purple varieties tend to have thicker spears, but fewer of them.

How to Harvest Asparagus
- Do not harvest during the first couple seasons (see information above).
- If you have young plants, the season may last 2 to 3 weeks. However, established plants produce longer—up to 8 weeks.
- Check your plant every other day for harvest-ready spears. Spears grow quickly and may become too woody before you know it! Once an asparagus spear starts to open and have foliage, it’s too tough for eating.
- Harvest spears when they reach 8 to 10 inches in height and between 1/2 and 3/4 inch thick. (Bear in mind that younger, thinner spears will be more tender, so harvest according to your own taste.)
- To harvest asparagus, simply cut the spears with a sharp knife or scissors at ground level.
- Stop harvesting spears when the diameter of the spears decreases to the size of a pencil.
- After harvest, fertilize your asparagus in early summer. You can top-dress with a balanced organic fertilizer, or scatter another inch of rich, weed-free compost over the decomposing mulch.
- Do NOT cut down the remaining ferns in summer or you will ruin your asparagus bed. Allow the ferns to grow and mature; this replenishes the nutrients for next year’s spear production. Always leave at least two or three spears on the plant through the growing season.
- Only cut back asparagus ferns AFTER the foliage has died back and turned brown or yellow. This is usually in early winter after several hard freezes. Cut the ferns back to the ground.
- Fertilize the bed with a 1-inch layer of rich, weed-free compost or manure topped with 3 inches of straw, rotted sawdust or another weed-free mulch. Clean spears will push up through the mulch in spring.

How to Store Asparagus
- Asparagus does not keep for very long after it’s picked, so be sure to eat it within two or three days from harvest.
- Brush off any visible dirt or give the spears a light washing with cold water before storing. It’s very important to dry washed spears thoroughly; moisture can lead to mold.
- To store, bundle the spears together, wrap the stem ends of the spears in a moist paper towel, and place the bundle in a plastic bag. Store in the crisper drawer of your refrigerator.
- If you have enough space in your fridge, you can also store asparagus by placing the spears in a cup of water. Keep about an inch of clean water in the cup.
- A pinch of baking soda in the cooking water keeps beans, spinach, and asparagus greener.
- At only 40 calories per cup, asparagus is amazingly good for you! See our list of awesome asparagus health benefits.
- For more planting tips, see our page on growing asparagus from seed.
Watch our video on how to properly clean and trim asparagus.
A simple and easy favorite when it comes to asparagus is fresh roasted asparagus. Or try this simple, delicious asparagus soup.


